Archive for February, 2007
How do users view Docs & Spreadsheets on the start page?
From the Google Apps for Education Support Site:
We have a Google Gadget for Google Apps Docs & Spreadsheets that you and your users can add to the personalized start page.
Here’s how:
- Log in to your start page at http://partnerpage.google.com/your_domain_name.com.
- Click Add Content on the top-left.
- Under Create a Section, enter http://www.google.com/ig/modules/docs.xml or docs.xml in the search box and press Go.
The D&S Gadget contains a preview of your documents and spreadsheets. Once it appears on the start page, you can click-and-drag the module to any location that works best for you.
Email-In Your Documents and Files for Google Docs and Spreadsheets
For users that had started using the Google Docs and Spreadsheets in our Google Apps for Education project, you can now start new online documents (spreadsheets coming soon) by emailing them directly to your unique this email address allocated, you can see your specific unique email address in the “upload” file option of Docs and Spreadsheets, after you successfully log in, they are of the following format:
[your+user+name] -dwt2ptv-Afs9ncjw@prod.writely.com
These steps were given in the Google page:
To try it, start a new email to the address shown above and:
* Enter some text and send the message.
– The message text will be entered into a new online document.
– The title of the document will be the subject of the email message.
* Or, attach a supported document (see above — spreadsheets coming soon)
– Each attached document will be converted to HTML and appear as a separate document.
– The title of each document will be the file name of each attachment.
– With attachments, the message text itself will be ignored.You can use this as a quick way to get a whole bunch of documents online at one time, or as an adjunct to how you currently collaborate with others (by CC’ing this email address when you pass around documents).
Please Note
* This email address is unique to you.
The address itself is long and complicated-looking just to help keep people from guessing it.
* You should receive an email confirmation for each document.
If you don’t receive a confirmation message, that means the document(s) didn’t make it online. If this is the case, please make sure you are using the email address shown above and that your e-mail is functioning correctly.
Google Docs & Spreadsheets for Google Apps
Google had just made available Docs & Spreadsheets, a word processing and a spreadsheet program, to Google Apps, a suite of communication services for organizations. Docs & Spreadsheets lets multiple users share files and collaborate on them.
Read how users are comparing Docs and Spreadsheets with other products:
![]() Gemodo’s Going to work with Google Apps, Google Apps enterprise
Gemodo’s Going to work with Google Apps, Google Apps enterprise
![]() Google OS’s Google Docs & Spreadsheets vs Microsoft Office
Google OS’s Google Docs & Spreadsheets vs Microsoft Office
How to add Yahoo, Hotmail, and POP3 e-mail accounts to Gmail
Now you can add all of your external e-mail accounts to Gmail. Its pretty simple to set up. Instructions can be found here, taken from Google’s question and answer page.
This feature is currently only enabled for a limited number of users. We’re working on making it more available soon.
1. Click Settings from the top of any Gmail page.
2. Click Accounts.
3. In the Get mail from other accounts section, click Add another mail address.
4. Enter the full email address of the account you’d like to access, then click Next Step.
5. Gmail will populate the Username and POP Server fields when possible, based on your email address. Enter your Password.
6. Before you can send mail as the new address, Gmail need to verify that you own this email address. To perform the verification click “Send Verification“. Gmail will then send an email to your email address with instructions on how to verify your address.
7. An email with a confirmation code will be sent to your email account, to add your email address, do one of the following : Click on the link in the confirmation email or Enter and verify the confirmation code in the Pop-up box,
8.Decide whether to:
* Leave a copy of retrieved messages on the server. If you’ll only be accessing your email through your Gmail account, leave this unchecked. If you’d like to be able to access your mail directly from that account, or if you’re accessing it through any other accounts or devices, click to select this option.
* Always use a secure connection (SSL) when retrieving mail.
* Label incoming messages. If you’d like to automatically label all messages that are retrieved from your non-Gmail account, select this option. You can choose to use the predefined label (your email address), or you can select an existing label or create a new one from the drop-down list.
* Archive incoming messages. Mail from this account can be archived directly, without showing up in your Inbox. Learn more about archiving.
9. Click Add Account.
10. Once your account has been added successfully, you’ll have the option of setting it as a custom From address. This allows you to compose messages in Gmail, but have them appear to be sent from your other email account (learn more). Click Yes to set up a custom From address.
You’re done! Gmail will now check your other account on a regular basis, and new mail will appear automatically in your Gmail account. You can disable importing at any time from the Accounts tab of your Settings page. Just click delete next to the appropriate email account.
Get Google Mail on your mobile phone
 It is new and it is fast. To try it for yourself, point your phone to googlemail.com/app
Download it once and start accessing Google Mail on your phone with just a click or two. You will also like it because:
* It has the same Google Mail interface you know and love
* Your account stays synchronised whether you access it from your computer or the phone
* You can easily view attachments such as photos, documents and .pdf files
Learn more about Google Mail for mobile devices.
How to migrate contact list from Qmail to Gmail
Export Contact List from Qmail
1. Go to http://mail2.smjk.edu.my/
2. Login to your old Email account
3. Click on the Address Book in the bottom of the Mail page

4. Click on the Import/Export at the top of the Address Book page

5. Select Comma Separated Values for export format and Select the source to export in the Export Address Book box

6. Click Export
7. Save the Contact List file into your computer
Import Contact List from Gmail
1. Go to http://mail.smjk.edu.my/
2. Login to your new Email account
3. Click Contacts at the left-hand side of any Email page
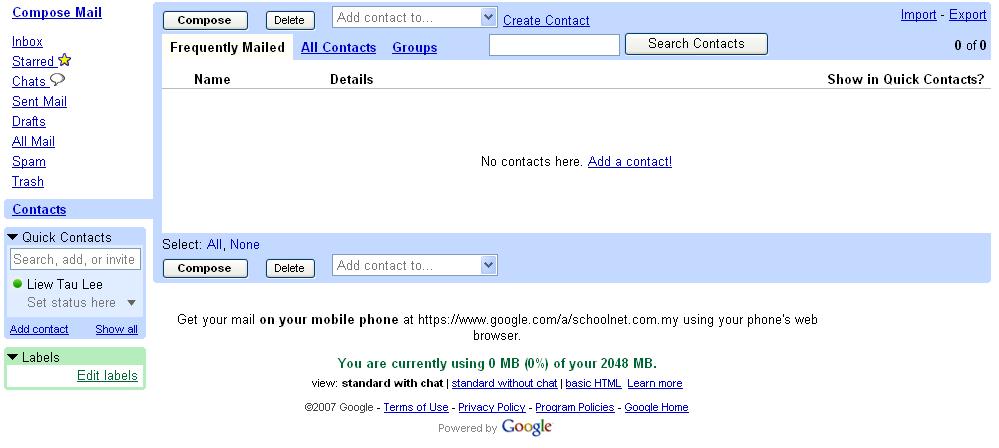
4. Click Import at the right-hand side of Contacts page
5. Click Browse… and locate the Contact List file from your computer to import

6. Click Import Contacts
7. You will see the successful Import Completed message

8. Click All Contacts of Contacts page to view the contact
Download How to migrate contact list from Qmail to Gmail (PDF Format)
Gmail mobile application for BlackBerry devices
 BlackBerry users can get quick and easy access to their Google-powered mail while on-the-go. The new downloadable mail application has the same familiar look and feel as Gmail on a standard browser, so that it’s just as simple to read and respond to email no matter where you are. Thanks to “prefetching” technology, emails load faster. And the mobile application is synchronized with your mail account, so when you send an email from your BlackBerry, you can find it in your ‘Sent Mail’ next time you access Gmail from your computer.
Navigate to m.google.com/a from the browser on your BlackBerry to download the free application. The application is free from Google, but carrier charges may apply.
How to configure your Outlook Express to read Gmail
1. Enable POP in your Email account.
a. Log in to your Email account.
b. Click Settings at the top of any Email page.
c. Click Forwarding and POP in the orange Mail Settings box.

d. Select Enable POP for all mail or Enable POP for mail that arrives from now on.
e. Choose the action you’d like your Email messages to take after they are accessed with POP.
f. Configure your POP client* and click Save Changes.
2. Open Outlook or Outlook Express.
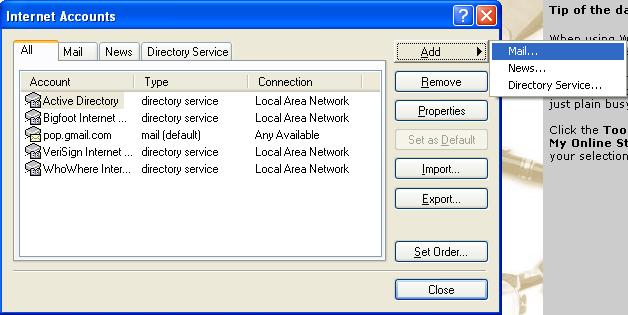
3. Click the ‘Tools’ menu, and select ‘Accounts…’

4. Click ‘Add,’ and then click ‘Mail…’

5. Enter your name in the ‘Display name:’ (John Smith) field, and click ‘Next.’

6. Enter your full email address (username@smjk.edu.my) in the ‘Email address:’ field, and click ‘Next.’

7. Enter ‘pop.gmail.com’ in the ‘Incoming mail (POP3, IMAP or HTTP) server:’ field. Enter ‘smtp.gmail.com’ in the ‘Outgoing mail (SMTP) server:’ field.
8. Click ‘Next.’

9. Enter your Email username (including ‘@smjk.edu.my’) in the ‘Account name:’ field. Enter your Email password in the ‘Password:’ field, and click ‘Next.’

10. Click ‘Finish.’
11. Highlight ‘pop.gmail.com’ under ‘Account,’ and click ‘Properties.’
12. Click the ‘Advanced’ tab.
13. Check the box next to ‘This server requires a secure connection (SSL)’ under ‘Outgoing Mail (SMTP).’
14. Enter ‘465’ in the ‘Outgoing mail (SMTP):’ field.
15. Check the box next to ‘This server requires a secure connection (SSL)’ under ‘Incoming mail (POP3).’ The port will change to 995.
*The order of ‘Outgoing’ and ‘Incoming’ mail server fields varies by version. Make sure you enter the correct information in each field.

16. Click the ‘Servers’ tab, and check the box next to ‘My server requires authentication.’

17. Click ‘OK.’
18. Congratulations! You’re done configuring your client to send and retrieve email messages.
Download Outlook Express Gmail Configuration Guide (PDF Format)
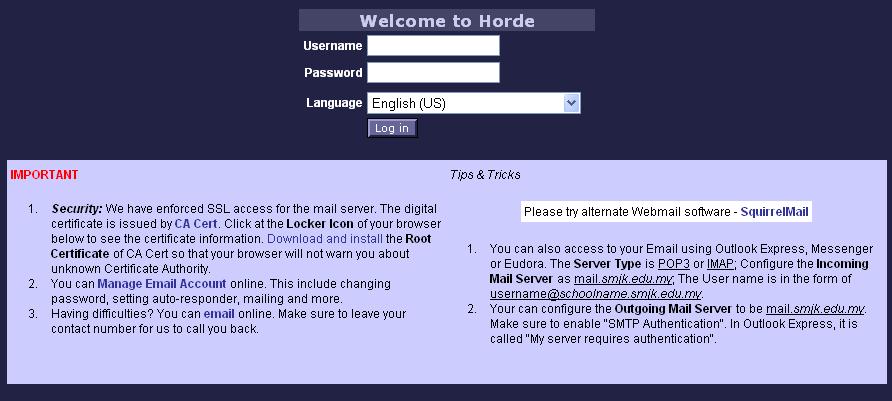
How to configure your Qmail to forward/redirect your email
1. Go to http://mail.smjk.edu.my or http://mail2.smjk.edu.my
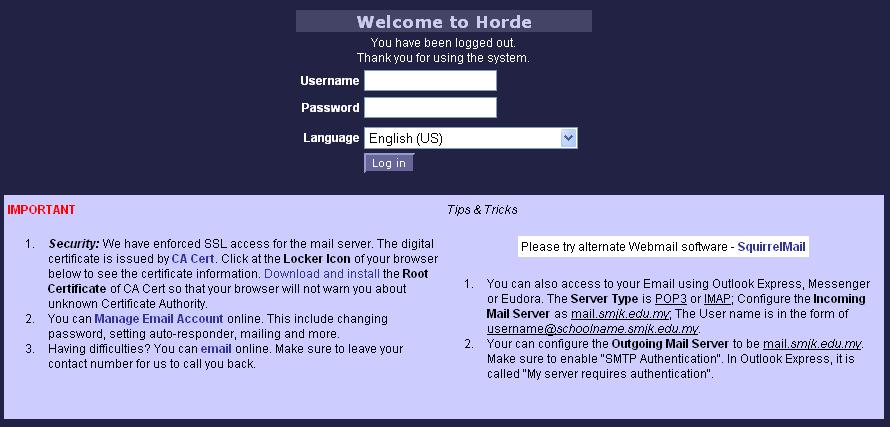
2. Click Manage Email Account at the light purple IMPORTANT box
3. Fill in all necessary fields to include the following information:
User Account: Enter your email username (not including @smjk.edu.my or @ppjitsin.smjk.edu.my)
Domain Name: Enter your domain name (eg: smjk.edu.my or ppjitsin.smjk.edu.my)
Password: Enter your email password
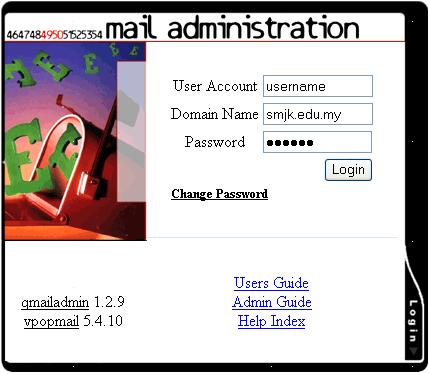
4. Click Login
5. Select Forward To: and enter an email account (eg: example@smjk.edu.my) which you want to forward to
6. Check the box next to Save a Copy

7. Click Modify User
8. Congratulations! You’re done configuring your email to automatically forward/redirect a copy of email to another email account
Download How to configure your Qmail to forward/redirect your email to other email accounts (PDF Format)
How to configure your Outlook to read from Gmail
1. Enable POP in your Email account.
a. Log in to your Email account.
b. Click Settings at the top of any Email page.
c. Click Forwarding and POP in the orange Mail Settings box.
d. Select Enable POP for all mail or Enable POP for mail that arrives from now on.
e. Choose the action you’d like your Email messages to take after they are accessed with POP.
f. Configure your POP client* and click Save Changes.
2. Open Outlook 2003.
3. Click the Tools menu, and select E-mail Accounts…
4. Select Add a new e-mail account, and click Next.
5. Choose POP3 as your server type by clicking the radio button, and click Next.
6. Fill in all necessary fields to include the following information:
User Information
Your Name: Enter your name as you would like it to appear in the From: field of outgoing messages.
Email Address: Enter your full email address (username@smjk.edu.my)
Server Information
Incoming mail server (POP3): pop.gmail.com
Outgoing mail server (SMTP): smtp.gmail.com
Login Information
User Name: Enter your email username (including @smjk.edu.my)
Password: Enter your email password

7. Click More Settings… and then click the Outgoing Server tab.
8. Check the box next to My outgoing server (SMTP) requires authentication and select Use same settings as my incoming mail server.
9. Click the Advanced tab, and check the box next to This server requires an encrypted connection (SSL) under Incoming Server (POP3).
10. Check the box next to This server requires an encrypted connection (SSL) under Outgoing Server (SMTP), and enter 465 in the Outgoing server (SMTP) box.
11. Click OK.
12. Click Test Account Settings… After receiving Congratulations! All tests completed successfully, click Close.
13. Click Next, and then click Finish.
14. Congratulations! You’re done configuring your client to send and retrieve email messages.
Download Outlook 2003 Gmail Configuration Guide (PDF Format)
