Upload Resource Files
All of the typical files that we use (PDFs, Word documents, presentation files, image files, spreadsheets, etc.) can be uploaded for listing within your Moodle course. Files must be uploaded one at a time, or you could put them in a folder and use a file compression program to “zip them” into a single file for uploading and later “unzipping” once they are in Moodle. To upload one or more files into your course:
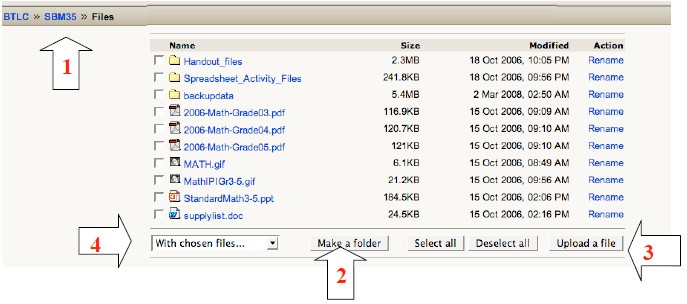
- If not already “within your course” then click on the course name after you have logged in. If you are an assigned teacher for that course, you will see the “Administration” options that you have appear in a block on the right side of your page. Click on the word “Files.”
- At this page you have the option to select, rename, (and sometimes even edit) files that you have previously uploaded, but also to “make a folder” or “upload a file.”
- If you click the “Upload a File” button a page will appear where you must first “Browse…” to select the file to upload. (Navigate after clicking “browse” to locate the file on your computer.) To upload the file to the Moodle server, click “Upload this file.” This may take several seconds dependent upon the size of the file and the speed of your Internet connection. Once the file is uploaded you will be returned to the screen listing all files/directories uploaded for this course.
- I recommend organizing the uploaded files into folders. You can check the boxes next to file names then choose “move to another folder” from the dropdown menu.
