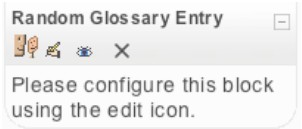
- Turn editing mode on.
- Select Random Glossary Entry (RGE) from the Blocks dropdown menu.

- Click on the editing icon to customize the block
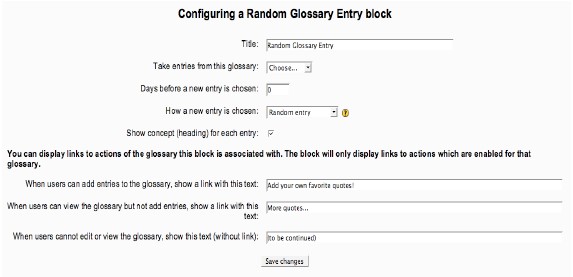
- Configure the block

- Title: This is the name of your glossary (i.e. Important Terms, FAQ, Chapter 10 Vocabulary, Mrs. Does’ Book Club…)
- Take entries from this glossary: Because you may have more than one glossary, you must specify where the terms will be taken from. Select the glossary that you want to be accessed.
- Days before a new entry is chosen: Specify if a new entry is displayed daily (enter 1), weekly (enter 7), annually (enter 365), or each time the student accesses the course page (enter 0).
- How a new entry is chosen:
- Random entry will shuffle through entries randomly.
- Last modified entry will display the entry that was most recently created / changed.
- Next entry will display entries in order – this works well for ‘Quote of the Day’ glossaries.
- Show concept heading for each entry: Decide if the heading for each entry should be shown. This may not be necessary for entries that have headings like Day 1 or John Brown, especially if the definition repeats the heading or is sufficient.
- When users can add entries to the glossary, show a link with this text: This phrase should be descriptive and direct students to add new entries. The default reads: Add your own quote!
- When users can view the glossary but not add entries, show a link with this text: This phrase should indicate that more information is available for browsing. The default reads: More quotes…
- When users cannot edit or view the glossary, show this text (without a link): This phrase should indicate that students do not have access to the block. The default reads To be continued
- Once the block is configured, click save changes. You will be redirected to your course’s main page. The RGE block will be visible and can be moved (click on the move icon) or further changed (click on the edit icon).

