Primary and secondary glossaries
The glossary activity is one of the most underrated in Moodle. On the surface, a glossary is a list of words and definitions that students can access. However, a course creator can allow students to add to a glossary. This transforms the glossary from a static listing of vocabulary words to a collaborative tool for learning.
You can use a glossary for building a class directory, a collection of past exam questions, famous quotations, or even an annotated collection of pictures.
Adding Glossary Entries
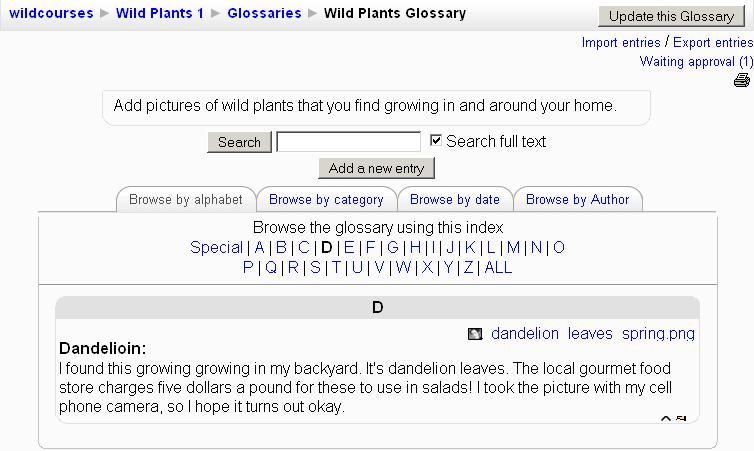
Selecting Glossary from the course menu displays the Glossary page. In this page, you can edit and browse the existing glossaries in your course. The following screenshot shows the Browse tab, where you can add a new entry:
On this page, concept is the term that you are adding to the glossary. Keyword(s) are synonyms—the equivalent of a ‘see also’ in an index or dictionary. These terms will link to the same definition as the concept.
Create new glossary categories by clicking the Add a new entry button. This button appears under each of the tabs when you’re browsing the glossary, so it’s always available.
Categories are created under the Browse Categories tab. Click the button labeled Edit categories under that tab to create, delete, and rename categories.
You can also upload an optional file for each glossary entry. The Import entries link is in the upper right corner. The Import and Export links enable you to exchange glossaries between courses and even Moodle installations. You might want to begin a course with a small glossary, and let students add to it as they discover new concepts. If you want to do this, export the beginning glossary so that you have it available for the next course. The next time you teach the course, you can choose to export everything in the completed course except student information and the glossary. In the new copy, just create a new, blank glossary and import the starting glossary.
Also, note that the editing window enables you to include hyperlinks in the definition (the icon). This can be used to link to freely available information on the Web, such as http://www.wikipedia.org/.
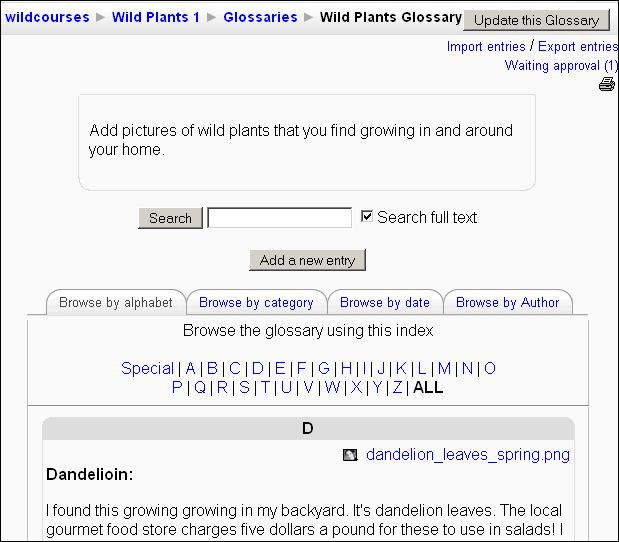
When you create a glossary, in the settings window you choose whether terms that students add are approved automatically, or whether they need the teacher’s approval. In this example, the Waiting approval tab is unavailable because terms are automatically approved. If that settings were turned off, new terms would await the teacher’s approval before being added. In the following screenshot, notice the link in the upper right corner for Awaiting approval:
Global Versus Local Glossary
Under Site Administration | Modules | Filters, the site administrator can turn on Glossary Auto-Linking. When this is turned on, any word appearing in the course from a glossary is highlighted in gray. Clicking the word brings up a pop-up window with the word’s glossary entry. By default, a glossary applies only to the course in which it resides. However, you can choose to make a glossary global, in which case the words from that glossary will be highlighted and become clickable wherever they are in your site. The work done in one course then becomes available to all the courses on your site. If your site’s subject matter is highly focused (as in our example, Wilderness Skills), consider using a global glossary. If your site’s subject matter is very broad, as in a university-wide learning site, you should use local glossaries to avoid confusion. For example, imagine you have a course on chemistry and another on statistics. Both use the word ‘granular’, but chemistry uses it to indicate a powdered substance while statistics uses it to indicate a fine level of detail.
Main and Secondary Glossaries
If you want students to be able to add entries to a glossary, you must make it a Secondary glossary. Only teachers can add terms to a Main glossary. A Secondary glossary has only the terms that the students and teacher add to. Since Moodle 1.7 and the introduction of roles, we have been able to override these settings and allow students to add entries to the Main glossary through the Override roles capabilities.
You can export terms one-at-time from a Secondary glossary to a Main glossary. So, you can create a Secondary glossary to which students will add terms. Then, you and/or the students can export the best terms to the Main glossary. Imagine a course with one Main glossary, and a Secondary glossary each time the course is run. The Main glossary would become a repository of the best terms added by each class.
You can add a Secondary glossary for each section in a course. For example, put a Secondary glossary into each topic or week. Then, you can create a Main glossary for the course that will automatically include all the terms added to each Secondary glossary. Put the Main glossary into Topic 0, the section at the top of the course’s Home Page. An alternative to using Secondary glossaries is to use one Main glossary, and create categories within that glossary for each section in the course. This keeps all glossary entries in one place.
If you want the course to have only one glossary, and you want students to be able to add to it, make it a Secondary glossary. Even though the term ‘Secondary’ implies that there is also a primary or main glossary, this is not the case. You can have just a Secondary glossary (or more than one) in a course, without a Main glossary.
Ratings and Comments
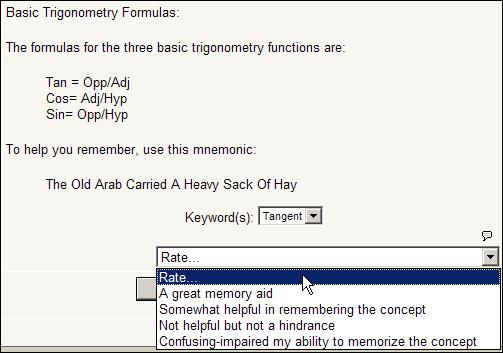
You can give students the ability to rate glossary entries, just like they can rate forum postings. The question is, what do you want students to rate—the glossary entry’s clarity? Its helpfulness? Your writing skill in creating the entry? You’ll need to consider what you want students to rate, and create a custom scale that supports the rating. You determine who can rate glossary entries, and what scale to use, on the Editing Glossary page:
In the previous screenshot, the course creator is applying a custom scale called Help Memorizing to the glossary. Students will be able to rate each glossary entry on how helpful it is in memorizing the material. From the student’s point of view, the result looks like the following:


