Populating the Glossary
There are a few ways to add data to a glossary: accessing the glossary directly, accessing the glossary via a Random Glossary Entry (RGE) Block, and importing data from another source.
- Accessing the glossary directly: click on your glossary

- Concept*: the term to be defined, or if the glossary is used for something other than a list of definitions: 1) Name of a student, artist, author… 2) Quotation 3) Title of work, site
- Definition *: The definition, explanation or information defined by the concept.
- Categories: You may choose to organize your concepts by chapter, subject matter, or not at all depending on the nature of the glossary, assignment and set0up of your course. There are no categories specified in a new glossary. You may specify them at any time by clicking on the Browse by category tab in teacher mode and clicking the Edit Categories button.
- Keywords: Enter each keyword or alias on a new line (not separated by commas). The aliased words and phrases can be used as alternative ways to refer to the entry. For example, if you are using the glossary auto-linking filter, then the aliases will be used (as well as the main name of the entry) when deciding what words to link to this entry.
- Attachment: You can choose to add an attachment file to the entry. This is useful if you are creating a photo gallery.
- To delete the attachment go to the files option of the administration block and look in the directory called moddata and the sub-directory called glossary. The file for each entry will be stored in each individual sub-directory.
Note: Unless you have set up your glossary entries as encyclopedia entries, the attachments will be visible as links only. You may choose to add graphics and other data by embedding in the definition. To do this click on the insert graphic icon at the top of the text box.
- To delete the attachment go to the files option of the administration block and look in the directory called moddata and the sub-directory called glossary. The file for each entry will be stored in each individual sub-directory.
- Auto-linking (check boxes): Turning on the automatic link feature will allow the entry to be automatically linked, whenever the concept words and phrases appear throughout the rest of the same course. This includes forum postings, internal resources, week summaries and so on.
-
- Checking This entry is case sensitive specifies whether matching exact upper and lower case is necessary when performing automatic linking to these entries. For example, if this is turned on, then a word like “html” in a forum posting will NOT be linked to a glossary entry called “HTML”.
- Checking Whole words matching will force only whole words to be linked, if automatic linking is enabled. For example, a glossary entry named “construct” will not create a link inside the word “constructivism”.
- Click Save changes at the bottom of the page to add the entry.

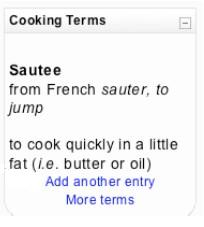
- Students may add data to a glossary through a RGE block if it has been set up to accept student entries.
- To do so, they must click on the link at the bottom of the block. (This link is formatted by the teacher and will be different for every RGE block.)
- The procedure for adding new entries is the same as above.
- Students may add data to a glossary through a RGE block if it has been set up to accept student entries.
- Importing data from another source
Teachers may import data from other glossaries and sources, including Word files.
If the data is already in someone’s Moodle, refer to Importing & Exporting a Glossary later in this handout. If the data is in a different form (i.e. a Word document or Excel file), you will need to create an xml file in order to import them.